How to Clean Gas Stove Burners
Maintaining a clean gas stove is essential for optimal performance and a tidy kitchen environment. Gas burners, with their intricate design, demand careful cleaning to ensure longevity and efficiency. In this guide, we'll explore expert tips and essential steps for effectively cleaning gas stove burners, providing you with a hassle-free approach to kitchen appliance maintenance. Discover the right tools, techniques, and materials that make the cleaning process manageable, allowing you to enjoy a spotless and functional gas stove. Keep your kitchen running smoothly with our comprehensive cleaning insights.
Choosing the Right Materials for Cleaning Your Gas Stove Burners
Ensuring the cleanliness of your gas stove burners not only enhances their performance but also contributes to a healthier cooking environment. Selecting the appropriate materials for cleaning is crucial to avoid damage and achieve effective results.
For burner heads, the Range Gas Surface Burner Cleaning Kit A03675801 is recommended, offering a specialized brush for slot cleaning, an ignition port cleaning tool, and a wire brush for comprehensive cleaning. This kit simplifies the process, ensuring your burner heads remain free from debris.
When dealing with burner grates and caps, the Cerama Bryte Burner Grate Cleaning Kit is an excellent choice. This cleaner is designed to safely and efficiently clean grates and caps on most gas ranges, promoting longevity and a polished appearance.
For the cooktop surface, Cerama Bryte Cooktop Cleaner is a reliable option, specifically formulated to remove stains and polish the stovetop. If you have a stainless steel cooktop, utilizing Cerama Bryte Stainless Steel Wipes ensures a streak-free and polished finish.
Selecting these high-quality cleaning materials not only safeguards your gas stove components but also streamlines the cleaning process, making it a manageable and rewarding task for kitchen maintenance. Incorporate these materials into your routine to keep your gas stove burners in optimal condition.
Effective Techniques for Cleaning Gas Stove Burners and Cooktop
Maintaining the cleanliness of your gas stove burners and cooktop is essential for optimal performance and a hygienic cooking space. Here are comprehensive steps and techniques to ensure a thorough cleaning process:
1. Allow Cooling: Before initiating the cleaning process, ensure that the burners and cooktop have cooled completely. Attempting to clean hot surfaces can be hazardous.
2. Soak Grates Overnight: For burner grates and caps, fill your sink with approximately 2 gallons of water. It doesn't need to be hot water as the grates will soak overnight. Add 3 tablespoons of gas grate cleaner to the water, stirring until dissolved. Immerse the grates and caps in this solution overnight.
3. Scrubbing: The next day, wearing rubber gloves, drain the sink and use a scrub brush or abrasive pad to clean softened soil and residue. Rinse thoroughly and wipe the grates clean with a towel. Avoid using this cleaner on enamel-coated grates.
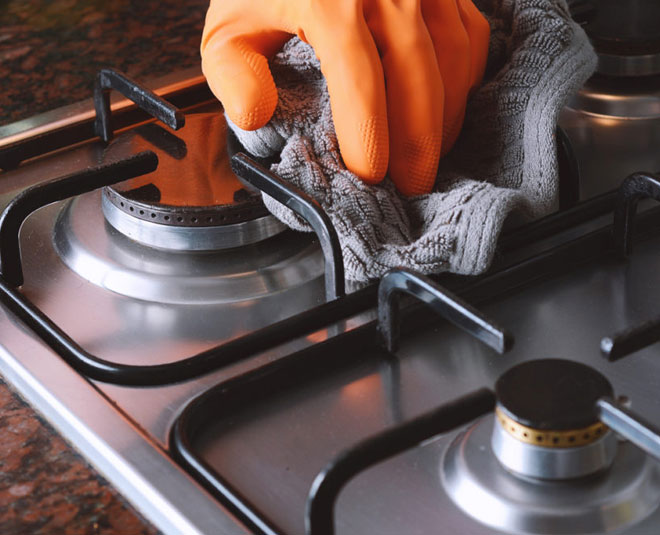
4. Wipe Burner Heads: With the burner heads cool, wipe each one with a damp cloth. Use the special brush from the burner head cleaning kit to clean between the slots. A toothbrush or paper clip can be employed for stubborn residue. Ensure the ignition port is cleaned for proper burner ignition.
5. Clean Cooktop Surface: Squeeze cooktop cleaner on the surface and rub it in using a dry cloth or paper towel. Buff the surface with a dry paper towel to remove cleaner residue, leaving a polished stovetop.
6. Stainless Steel Cooktops: For stainless steel surfaces, use stainless steel cleaning wipes. Wipe in the direction of the grain and polish with a dry, non-abrasive cloth. Test the cleaner on an inconspicuous area before applying it to the entire surface.
7. Frequency of Cleaning: The frequency of cleaning depends on usage. Generally, cleaning every other month is advisable to maintain efficiency and appearance. Address major spills promptly.
Incorporating these steps into your routine ensures a spotless and well-functioning gas stove, creating a conducive environment for enjoyable cooking experiences.
Efficient Cleaning of Gas Stove Grates and Burner Caps
Maintaining a clean cooking environment is crucial for the efficient performance of your gas stove. When it comes to cleaning grates and burner caps, follow these steps for effective results:
Start by allowing the burners and cooktop to cool completely. Once cool, fill your kitchen sink with around 2 gallons of water—no need for hot water, as you'll be soaking the grates overnight.
Add 3 tablespoons of gas grate cleaner to the water, ensuring the granules dissolve completely. Wear gloves while handling this potent cleaner.
Immerse the grates and burner caps in the cleaning solution and let them soak overnight. This soaking process helps soften stubborn residue.
The next day, wearing rubber gloves, drain the sink. Use a scrub brush, abrasive pad, or the scrubber included in the grate cleaning kit to clean softened soil and residue.
Rinse everything thoroughly and wipe the grates clean with a towel.
It's important to note that this cleaner is not suitable for enamel-coated grates. Refer to your owner's manual for specific cleaning instructions.
By incorporating these steps into your cleaning routine, you'll ensure the longevity and optimal performance of your gas stove's grates and burner caps.
Effective Cleaning for Gas Burner Heads
To maintain optimal gas flow and even heating on your stove, regular cleaning of the burner heads is essential. Here's a quick guide:
Cool Heads Prevail: Ensure the burner heads are cool to the touch before cleaning.
Gentle Wipe Down: Using a damp cloth, gently wipe each burner head to remove surface dirt and debris.
Get into the Slots: Utilize the special brush from a burner head cleaning kit to clean between the slots. A toothbrush can also work well for intricate spaces.
Tackle Stubborn Residue: For stubborn residue, employ a paper clip, sewing needle, or small-gauge wire to carefully remove it.
Thorough Brushing: Use the wire cleaning brush from the kit to clean spills and debris thoroughly.
Ignition Port Attention: Ensure the ignition port is clean using the designated tool from the kit or a paper clip/small wire.
Final Wipe Down: After slot and port cleaning, wipe the entire burner head with a damp cloth to ensure cleanliness.
By incorporating these simple steps into your cleaning routine, you'll enhance the functionality and longevity of your gas burner heads.
Effortless Maintenance for a Gleaming Gas Cooktop Surface: Possible?
Keeping your gas cooktop surface pristine requires minimal effort. Here's a quick guide:
Squeeze a small amount of cooktop cleaner onto the surface, distributing it evenly.
Rub the cleaner into the surface using a dry cloth or paper towel, ensuring even coverage.
Buff the cooktop surface with a dry paper towel to remove any cleaner residue and polish the stovetop.
For a stainless steel cooktop, use stainless steel cleaning wipes, wiping in the same direction as the grain.
Polish the stainless surface with a dry, non-abrasive cloth to eliminate dirt, smudges, fingerprints, and any remaining cleaner residue.
This straightforward process leaves your gas cooktop surface not only spotless but also looking brand new.
Mega Appliance Fix: Your Reliable Gas Stove Repair Partner?
Mega Appliance Fix stands as a trusted partner for all your gas stove repair and maintenance needs. With thousands of highly skilled and thoroughly trained range cooktop repair technicians across the US, we're dedicated to keeping your cooking appliances in top-notch condition. Our expert technicians are proficient in fixing various types and brands, including Frigidaire, Whirlpool, Maytag, Bosch, and Kenmore.
We offer timely and efficient services, ensuring your gas stove operates seamlessly. Whether you need a quick repair or an annual maintenance appointment, Mega Appliance Fix delivers professional solutions to extend the lifespan of your appliances. Schedule your appointment today and experience reliable service from the experts at Mega Appliance Fix.


