Dryer Maintenance Tips for Optimal Performance
Regular maintenance is crucial for keeping your dryer running efficiently and safely. From cleaning the lint trap and dryer vent to troubleshooting common issues, these simple steps can prevent breakdowns, reduce energy costs, and extend the life of your appliance. Here’s how to keep your dryer in top condition.
Dryer Maintenance Tips for Optimal Performance
Proper dryer maintenance is crucial for ensuring optimal performance and extending the life of your appliance. One of the most important steps is regularly cleaning the dryer vent. A clogged vent not only reduces efficiency but also poses a fire hazard. To clean the vent, disconnect the dryer and use a vent brush or vacuum to remove lint buildup. This should be done at least once a year, or more frequently if you notice drying times increasing.
Additionally, always clean the lint filter after every load. A clean filter improves airflow and speeds up drying times. Also, periodically inspect the dryer drum and door seal for any signs of wear or damage, and replace them as needed.
If your dryer isn’t heating properly or takes too long to dry clothes, these are common dryer troubleshooting signs that may indicate issues with the heating element or thermostat. Addressing these problems early can prevent more costly repairs and ensure your dryer continues to operate efficiently. Regular maintenance is key to keeping your dryer in top condition and avoiding unexpected breakdowns.
Cleaning the Lint Trap and Vent
Regularly cleaning the lint trap and vent is a crucial part of dryer maintenance, ensuring that your appliance runs efficiently and safely. A clogged lint trap or vent can lead to longer drying times, higher energy bills, and even potential fire hazards. To keep your dryer in optimal condition, it’s essential to follow a consistent cleaning routine.
- Cleaning the Lint Trap
- Cleaning the Dryer Vent
- Signs of Trouble
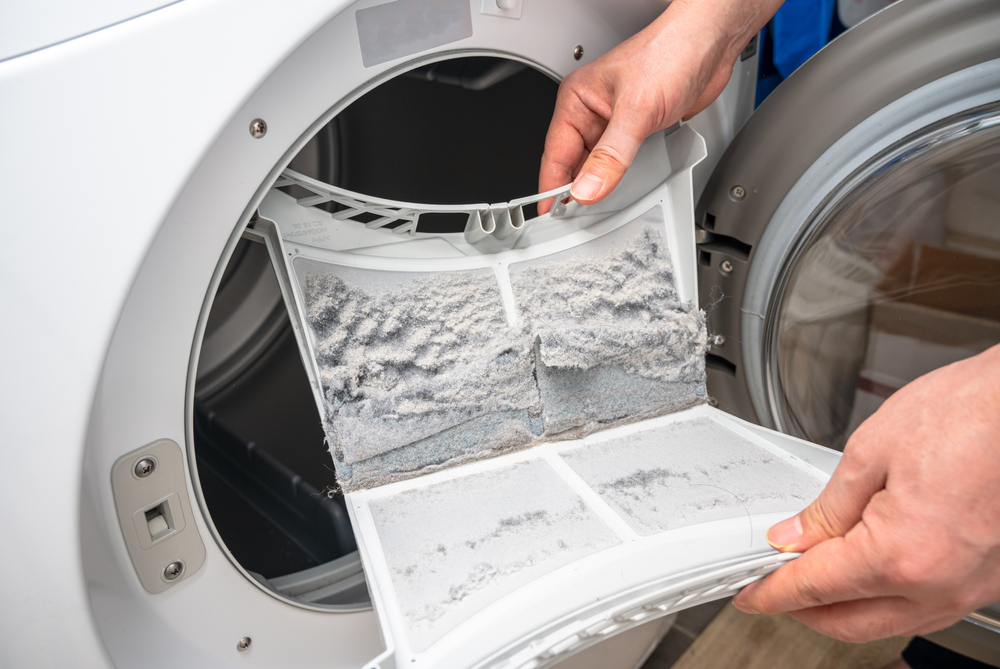
Cleaning the Lint Trap. The lint trap should be cleaned after every load of laundry. This simple step helps maintain proper airflow within the dryer, allowing it to function efficiently. To clean the lint trap, simply remove it from the dryer, and use your fingers or a soft brush to remove the accumulated lint. Occasionally, you may want to wash the lint trap with warm, soapy water to remove any residue that may have built up from fabric softeners or dryer sheets. Make sure the trap is completely dry before reinserting it into the dryer.
Cleaning the Dryer Vent. The dryer vent, which expels hot air and moisture from the dryer, can become clogged over time with lint and debris. This not only reduces the dryer’s efficiency but also poses a significant fire risk. It’s recommended to clean the dryer vent at least once a year, or more frequently if you notice your dryer taking longer to dry clothes.
To clean the vent, first, disconnect the dryer from the power source. Then, use a vacuum cleaner or a vent brush to remove lint and debris from the vent opening and the ductwork. For longer vents, you may need to use a specialized brush designed to reach deep into the vent. After cleaning, reconnect the dryer and ensure that the vent hose is securely attached and not kinked.
Signs of Trouble. If, despite regular cleaning, you notice that your dryer is still taking longer than usual to dry clothes or if the outside of the dryer feels excessively hot, these could be signs of a blocked vent or another issue. This type of dryer troubleshooting may require professional inspection to ensure everything is functioning correctly.
By consistently cleaning the lint trap and vent, you can enhance your dryer’s performance, reduce energy consumption, and minimize the risk of fire, ensuring a safe and efficient laundry routine.
Preventing Overheating Issues
Overheating is a common problem in dryers that can lead to reduced efficiency, increased energy consumption, and, in severe cases, fire hazards. Preventing overheating issues is a critical aspect of dryer maintenance, and there are several steps you can take to ensure your dryer operates safely and efficiently.
- Regularly Clean the Dryer Vent
- Clean the Lint Trap After Every Use
- Avoid Overloading the Dryer
- Monitor Dryer Performance
Regularly Clean the Dryer Vent. One of the primary causes of dryer overheating is a clogged dryer vent. Over time, lint and debris can accumulate in the vent, restricting airflow and causing the dryer to overheat. To prevent this, it’s essential to clean the dryer vent at least once a year. Disconnect the dryer from the power source, then use a vent brush or vacuum cleaner to remove any lint buildup in the vent and ductwork. Ensuring a clear vent allows heat to escape properly, preventing overheating.
Clean the Lint Trap After Every Use. Another important step in preventing overheating is regularly cleaning the lint trap. A clogged lint trap can impede airflow, causing the dryer to work harder and generate more heat. After each drying cycle, remove the lint trap, clear out any accumulated lint, and reinsert it into the dryer. This simple step not only helps prevent overheating but also improves drying efficiency.
Avoid Overloading the Dryer. Overloading the dryer is a common mistake that can lead to overheating. When a dryer is too full, clothes can’t tumble freely, causing the dryer to overwork and generate excess heat. Always follow the manufacturer’s guidelines for load size, and if necessary, divide large loads into smaller batches to ensure even drying and prevent the appliance from overheating.
Monitor Dryer Performance. Keep an eye out for dryer troubleshooting signs that could indicate overheating, such as unusually hot surfaces, a burning smell, or clothes that come out excessively hot. If you notice any of these signs, it’s crucial to stop using the dryer immediately and inspect the vent, lint trap, and drum for blockages or other issues. If the problem persists, consider contacting a professional for further inspection and repair.
By following these dryer maintenance tips and taking proactive measures to clean the dryer vent, lint trap, and avoid overloading, you can significantly reduce the risk of overheating, ensuring your dryer operates safely and efficiently for years to come.
Checking the Exhaust Duct
Regularly checking the exhaust duct is a vital part of dryer maintenance that helps prevent common issues like overheating, inefficient drying, and potential fire hazards. The exhaust duct plays a crucial role in venting hot air and moisture from your dryer to the outside of your home, but if it becomes clogged or damaged, it can lead to significant problems. Here’s how to properly inspect and maintain your dryer’s exhaust duct.
- Inspect the Duct for Blockages
- Clean the Exhaust Duct
- Check for Duct Damage
- Ensure Proper Ventilation
- Monitor Performance
Inspect the Duct for Blockages. Over time, lint, dust, and other debris can accumulate inside the exhaust duct, restricting airflow and causing the dryer to work harder, which increases the risk of overheating. To check for blockages, first, disconnect the dryer from the power source. Then, detach the duct from the back of the dryer and the vent on the outside of your home. Use a flashlight to inspect the interior of the duct, looking for any lint buildup or obstructions.
Clean the Exhaust Duct. If you notice any blockages, it’s important to clean the exhaust duct thoroughly. Use a long-handled vent brush or a vacuum cleaner with a hose attachment to remove lint and debris from inside the duct. For longer ducts, consider using a specialized dryer vent cleaning kit that can reach deep into the duct. Cleaning the duct regularly, ideally at least once a year, ensures that air can flow freely, preventing the dryer from overheating and reducing the risk of fire.
Check for Duct Damage. While inspecting the duct, also check for any signs of wear and tear, such as cracks, holes, or kinks in the ductwork. Damaged ducts can leak hot air into your home, reducing the dryer’s efficiency and potentially causing overheating. If you find any damage, it’s important to repair or replace the duct immediately. Use metal duct tape to seal any small holes or consider replacing sections of the duct that are beyond repair.
Ensure Proper Ventilation. After cleaning and inspecting the duct, make sure it is securely reconnected to both the dryer and the external vent. The duct should be as straight and short as possible to allow for efficient airflow. Avoid using flexible plastic ducts, as they are more prone to kinking and can easily become clogged. Instead, opt for rigid or semi-rigid metal ducts, which are more durable and less likely to accumulate lint.
Monitor Performance. Even with regular maintenance, it’s important to keep an eye on dryer troubleshooting signs that could indicate problems with the exhaust duct. If you notice longer drying times, excessive heat, or a burning smell, these could be signs that the duct is blocked or damaged, requiring further inspection and cleaning.
By regularly checking and maintaining the exhaust duct, you can ensure that your dryer operates efficiently and safely, reducing the risk of overheating and extending the life of your appliance.
Troubleshooting Common Dryer Issues
Regular dryer maintenance is essential to keep your appliance running smoothly, but even with the best care, issues can still arise. Understanding how to troubleshoot common dryer problems can save you time and money, helping you address issues before they escalate into costly repairs. Here are some common dryer troubleshooting tips to keep your dryer in optimal condition.
- Dryer Not Heating Properly
- Clothes Taking Too Long to Dry
- Unusual Noises
- Dryer Shutting Off Mid-Cycle
- Burning Smell
Dryer Not Heating Properly. If your dryer isn’t producing enough heat, the first step is to check the settings. Ensure the cycle selected is appropriate for the load type. If the settings are correct, the issue could be related to a clogged dryer vent. A blocked vent restricts airflow, causing the dryer to overheat or underperform. Cleaning the dryer vent thoroughly can often resolve this issue. Additionally, inspect the heating element and thermostat, as these components may need replacement if they’re malfunctioning.
Clothes Taking Too Long to Dry. When drying times increase, it usually indicates restricted airflow or an overloaded dryer. Start by cleaning the lint trap after each use to ensure it’s not obstructing airflow. If the problem persists, check the exhaust duct for blockages. A thorough cleaning of the dryer vent and duct can restore efficient airflow and reduce drying times. Also, avoid overloading the dryer, as this can strain the appliance and extend drying cycles.
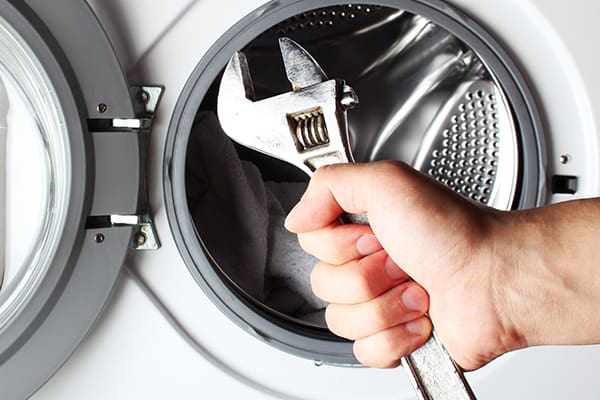
Unusual Noises. Strange noises like thumping, squeaking, or rattling can be signs of worn-out parts or loose components. First, ensure the dryer is level and the load is balanced. If the noise continues, inspect the drum belt, rollers, and pulleys for wear and tear. Replacing any damaged parts can often resolve these issues. Regular maintenance, including tightening any loose screws or bolts, can prevent these problems from developing.
Dryer Shutting Off Mid-Cycle. If your dryer shuts off unexpectedly, it could be overheating due to a clogged vent or lint trap. Cleaning the dryer vent and ensuring proper ventilation can often solve this problem. Additionally, check the thermal fuse, which may need replacement if it’s blown. This component shuts off the dryer when it overheats, so addressing the root cause is crucial.
Burning Smell. A burning smell is a serious issue that requires immediate attention. Turn off the dryer and unplug it right away. This smell often indicates that lint has built up in the vent or around the heating element, posing a fire hazard. Thoroughly clean the dryer vent, lint trap, and surrounding areas to remove any lint or debris. If the smell persists, it’s best to call a professional to inspect the appliance.
By addressing these common issues promptly, you can keep your dryer running efficiently and safely, prolonging its lifespan and avoiding costly repairs. Regular maintenance, including cleaning the dryer vent and lint trap, is key to preventing many of these problems.


