Replacing Parts: A DIY Guide for Dishwasher Repair
Dishwashers are essential appliances in modern kitchens, offering convenience and efficiency in cleaning dishes. Over time, the racks in a dishwasher can become worn or damaged, affecting their functionality. Upgrading your dishwasher racks can improve the loading capacity, ensure dishes are properly supported during the wash cycle, and enhance overall cleaning performance. This guide will provide step-by-step instructions on how to upgrade your dishwasher racks to improve the efficiency and longevity of your dishwasher.
Diagnosing Common Dishwasher Issues
Diagnosing common dishwasher issues is the first step in determining if a part replacement is necessary. Here are some common problems and how to diagnose them:
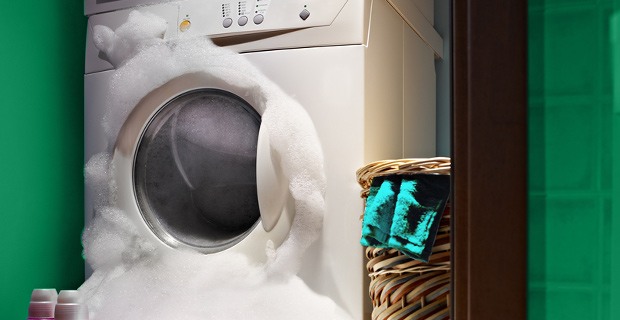
Leaking
Check the door seal for any signs of wear or damage. Run a cycle and observe where the leak is coming from to determine if the seal needs to be replaced.
Poor Cleaning Performance
Check the spray arms for clogs or damage. Inspect the filter and clean it if necessary. Ensure that dishes are loaded correctly and that the water temperature is adequate.
Dishes Not Drying Properly
Check the rinse aid dispenser and ensure it is filled. Verify that the heating element is functioning properly by running a wash cycle and checking if it is warm at the end.
Noisy Operation
Listen for any unusual noises during the wash cycle. Check the spray arms and racks for proper positioning and look for any loose or worn parts.
Water Not Draining
Check the drain hose for kinks or clogs. Inspect the drain pump for any obstructions and ensure it is functioning properly.
By systematically checking these common issues, you can determine the root cause of the problem and decide if a part replacement is necessary. If you are unsure or uncomfortable with performing the diagnosis, it may be best to consult a professional dishwasher repair service.
Replacing a Worn-Out Door Seal
Replacing a worn-out door seal on your dishwasher is a relatively simple process that can help prevent leaks and ensure optimal performance. Here's a step-by-step guide to replacing the door seal:
- Gather Your Supplies
- Turn Off the Power
- Remove the Old Seal
- Clean the Area
- Install the New Seal
- Test the Door
- Reconnect the Power
Gather Your Supplies. Before you begin, make sure you have a replacement door seal that is compatible with your dishwasher model. You may also need a screwdriver and a clean cloth.
Turn Off the Power. For safety reasons, it's important to turn off the power to your dishwasher before you start working on it. You can do this by unplugging the dishwasher or turning off the circuit breaker.
Remove the Old Seal. Open the dishwasher door and locate the old door seal. Carefully peel the old seal away from the channel around the door. Take note of how the old seal was installed, as you will need to install the new one in the same way.
Clean the Area. Use a clean cloth to wipe down the channel where the old seal was located. Remove any dirt, debris, or residue to ensure a clean surface for the new seal.
Install the New Seal. Starting at one corner, press the new door seal into the channel around the door. Work your way around the door, pressing the seal firmly into place. Make sure the seal is seated securely and evenly in the channel.
Test the Door. Close the dishwasher door and check to make sure it closes properly with the new seal in place. Run a short wash cycle to test for leaks.
Reconnect the Power. Once you have confirmed that the new seal is installed correctly and there are no leaks, you can plug the dishwasher back in or turn the circuit breaker back on.
Replacing a worn-out door seal is a simple and effective way to maintain your dishwasher and prevent leaks. By following these steps, you can ensure that your dishwasher continues to operate efficiently for years to come.
Installing a New Spray Arm
Installing a new spray arm in your dishwasher can improve water distribution and cleaning performance. Here's a step-by-step guide to replacing the spray arm:
Purchase the Correct Spray Arm
Before you begin, make sure you have the correct replacement spray arm for your dishwasher model. Consult your dishwasher's manual or contact the manufacturer if you're unsure.
Turn Off the Power
To ensure safety, turn off the power to your dishwasher. You can do this by unplugging the dishwasher or turning off the circuit breaker.
Remove the Old Spray Arm
Open the dishwasher door and locate the spray arm. Depending on the model, the spray arm may be attached with a screw or simply snapped into place. Remove any screws or clips holding the spray arm in place, and then carefully pull the old spray arm off the dishwasher.
Clean the Area
Use a clean cloth to wipe down the area where the old spray arm was located. Remove any debris or buildup to ensure a clean surface for the new spray arm.
Install the New Spray Arm
Align the new spray arm with the water feed tube in the dishwasher. If the spray arm snaps into place, press it firmly until you hear it click. If it is secured with a screw, insert the screw and tighten it to secure the spray arm in place.
Test the Spray Arm
Close the dishwasher door and run a short wash cycle to test the new spray arm. Ensure that it rotates freely and that water is distributed evenly.
Reconnect the Power
Once you have confirmed that the new spray arm is installed correctly and working properly, you can plug the dishwasher back in or turn the circuit breaker back on.
Replacing the spray arm in your dishwasher is a simple task that can improve its cleaning performance. By following these steps, you can ensure that your dishwasher continues to operate efficiently.
Replacing a Faulty Drain Pump
Replacing a faulty drain pump in your dishwasher can resolve issues with water not draining properly. Here's a step-by-step guide to replacing the drain pump:
Purchase the Correct Drain Pump. Before you begin, ensure you have the correct replacement drain pump for your dishwasher model. Refer to your dishwasher's manual or contact the manufacturer for assistance.
Turn Off the Power. To ensure safety, turn off the power to your dishwasher. You can do this by unplugging the dishwasher or turning off the circuit breaker.
Access the Drain Pump. Locate the drain pump in your dishwasher. It is typically located at the bottom of the dishwasher, near the back. You may need to remove the lower front panel or the kick plate to access the pump.
Disconnect the Drain Hose. Disconnect the drain hose from the drain pump. Use a towel or a container to catch any water that may spill out of the hose.
Remove the Old Drain Pump. Depending on the model, the drain pump may be secured with screws or clips. Remove any screws or clips holding the pump in place, and then carefully pull the pump away from the dishwasher.
Install the New Drain Pump. Align the new drain pump with the mounting bracket in the dishwasher. Secure the pump in place with screws or clips.
Reconnect the Drain Hose. Reconnect the drain hose to the new pump. Ensure it is securely attached to prevent leaks.
Test the New Drain Pump. Close the dishwasher door and run a short wash cycle to test the new drain pump. Check for any leaks and ensure that water drains properly.
Reconnect the Power. Once you have confirmed that the new drain pump is installed correctly and working properly, you can plug the dishwasher back in or turn the circuit breaker back on.
Replacing a faulty drain pump in your dishwasher can restore proper drainage and prevent water from pooling at the bottom of the dishwasher. By following these steps, you can effectively replace the drain pump and ensure your dishwasher continues to operate efficiently.
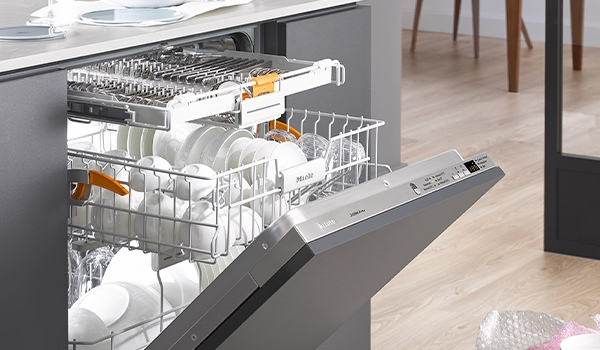
Upgrading Dishwasher Racks
Upgrading your dishwasher racks can improve the functionality and efficiency of your dishwasher. Here's how you can upgrade your dishwasher racks:
Identify the Correct Replacement Racks
Before you begin, identify the correct replacement racks for your dishwasher model. You can find this information in your dishwasher's manual or by contacting the manufacturer.
Turn Off the Power
To ensure safety, turn off the power to your dishwasher. You can do this by unplugging the dishwasher or turning off the circuit breaker.
Remove the Old Racks
Open the dishwasher door and remove the old racks by sliding them out of the dishwasher. Some racks may be attached to the dishwasher with clips or screws. Remove any fasteners holding the racks in place.
Install the New Racks
Slide the new racks into the dishwasher, ensuring they are properly aligned with the tracks. Push the racks all the way in until they are securely in place.
Test the New Racks
Close the dishwasher door and run a short wash cycle to test the new racks. Ensure that the racks move smoothly and that dishes are properly supported during the wash cycle.
Reconnect the Power
Once you have confirmed that the new racks are installed correctly and working properly, you can plug the dishwasher back in or turn the circuit breaker back on.
Upgrading your dishwasher racks can improve the overall performance of your dishwasher and ensure that your dishes are properly cleaned and dried. By following these steps, you can easily upgrade your dishwasher racks and enjoy a more efficient dishwasher.